Showing posts with label Upcycled. Show all posts

Monday, July 9, 2012

Pop Can Flower


I love making these Pop Can Flowers!
They are so shiny and cute, and it's fun to make Upcycled Crafts!!

Here's how you can make one too:


Rinse out a Can (Beer, Soda, Energy Drink, what ev)
Then cut the top off by poking your scissors into the can and then cutting around


Cut 1/2 inch to 1 inch strips all the way down to the bottom ledge there
Do this all the way around the can


You should end up with this
Now bend the "petals" down one at a time


This is super easy, but make sure to bend them down at the base


When you're done you should have this
You can leave it silver like this or do what I did and color it with a Sharpie
You can also spray paint which would be much quicker but with the Sharpie you still get the shiny look


I hot glued a wooden skewer to the back of one of the "petals" that I colored Green and stuck in a planter


Here's a close up 
It's way cute but I felt it needed a finishing touch so....


I curled the edges of the petals with my Sharpie Pen

I LOVE LOVE LOVE IT!


Every time I look out my back door it just makes me smile!
It's so bright, shiny and colorful!!

Added Tip:
If you want your flower to spin, then poke a hole thru the middle and put a thumb tack or nail thru the hole into a piece of wood/stick/dowel.  
Then it will spin when the wind blows!  
Be sure to make the hole a little bigger than the Tack/Nail

Have a great day!!!

Monday, June 25, 2012

Wine Cork Key Chain

Yo!

Did you miss me???
It's been like two weeks since I've posted :(

So sorry ladies and gent...I'll be better promise!

So today I have a simple project for you...takes only a few minutes of your time.

We love projects like that don't we!

Alright, here it goes:


Here's what you need:
A Wine Cork
An Eye Pin
Key Chain Loop (brain fart, can't remember what they are called)
Super Glue or your fav glue that you think would work


I used the pre existing hole from opening up my bottle of Moscato..hmmmmm so yummy!
I added some glue carefully in the hole and on the screw part of the Eye Pin and inserted it into the cork.


I let it dry, for me it only took a few minutes.
Then I added the Key Chain part.

Are you still with me?
I know this is so hard huh? LOL :)


Add your key(s) and you're done!

SO EASY!
So easy that I could shout it from the roof tops!!!

I think it's super cute.
It's simple...but cute.

Plus I love the footprint on this cork, it's cute :)


Cheers
and
Happy Crafting!

Sunday, May 6, 2012

Duct Tape Roll Art


I have a ton of empty Duct Tape Rolls lying around...I just can't bring myself to throw them in the recycle bin.
So I made a Duct Tape Roll Cross for my bedroom!
A couple days ago one of my followers Noreen asked me what she could do with her empty rolls.
It was perfect timing cause I had already had a few idea's up my sleeve for this week. 
So Noreen, here is just one of those idea's I promised you :)

Here's how I did it:


I grabbed a bunch of empty rolls and started laying them out on my counter.
I knew I wanted to make a cross so I just moved them around until I got the cross that I liked.

I ended up using 10 rolls.  6 going down the vertical part of the cross, and 2 on each side for the horizontal portion of the cross.


Next I broke out my hot glue gun...I heart my glue gun!
I simply put one thick strip of glue down the side of the roll and connected it to another roll.
I squeezed them together for a second and that was it.


I went on to the next one, making sure to keep the shape of my cross and making sure they were even.


Half way done.  So now I took it outside and spray painted it with a light blue spray paint I already had in the garage.  It matches the blue in my bedroom so it worked out well.
Our bedroom colors are tan, light blue and brown.


Done! Now all I needed was one little nail and I hung it on my wall....Well Crafty Soccer Dad actually did the hammering of the nail into the wall.
I gotta give credit where credit is due :) 


So what do you think? 
I love it!  
I think it's pretty awesome!  I'm really happy with how it turned out.

I'll have more projects soon, that you can use your empty DT rolls.

Have a great day 
and
Happy Crafting!

Thursday, April 26, 2012

DIY Bubble Fun


This is so much fun!
First let me start out by saying, this past weekend it was 80 Degrees...
the last couple days have been rainy and overcast :(

So when we looked outside and saw a break in the rain and some sunshine...
we jumped on it.
We went outside and had some bubble fun :)

 
I took a small empty plastic soda bottle and cut off the bottom.
You could use a water bottle, probably even a 2 liter but I haven't tried that.

I cut up an old hand towel and covered the bottom of the bottle using rubber bands.
I suppose you could hot glue it, but it was quicker to just wrap some rubber bands around it.
We were on borrowed time here lol...

I put some bubbles in a shallow bowl.
For my post on a DIY Bubble Recipe go HERE

I dampened the towel first then set it in the bowl.


Pick it up and blow thru the mouth piece....and
Let the games begin!!!


It is VERY windy where I live, so big bubble chunks were flying everywhere!!

Bubble Chunk..
But never fear!
Batman is here!!
Or Batman Crocs are here to stomp out the bubbles LOL :)


What you end up getting is a long tube like bubble chunk (for lack of a better word)
We seriously had so much fun with this!

Until it went from this...


To this...


And now it's raining!

But I'm so glad I jumped on that 15-20 minutes of sunshine, it was so worth it.

So here's a recap of what you need for this fun project:
An empty plastic bottle
Old washcloth or towel (the thinner the better)
Bubbles
Rubber Bands (just a couple)
Scissors

So easy, and some good 'ole recycled fun :)

Enjoy your day
and
Happy Crafting!

Monday, April 16, 2012

Creamer Container to Snack Container


This is the coolest idea ever!  Ok maybe not ever..but pretty darn ingenius if you ask me.

I will totally admit it's not my idea, wish I could say it was but I found it on Pinterest.

That pic is an actual pic of my empty Coffee Creamer Bottle from this morning.
Its the mega big bottle...yeah I'm one of those "I like a little coffee with my creamer" types :)
P.S. If you haven't tried the Italian Sweet Cream it is the BEST!!!


I cleaned out the container, peel off the wrapper (super easy) and filled it up with Goldfish!
This would be perfect for in the car, or in a bag, cause I don't know about you but sometimes Ziplocs just don't work out so well in the car and/or in your purse!

Let's face it, they tear, and they spill easy.
That's why this is so handy!

Tried out the pouring skills on this bad boy and it works fab-U-lous!


There's my youngest with a mouth full of Goldfish as his mother so conveniently told him to smile for the camera.  He's a good boy, thanks buddy!

So I'm totally loving this idea.  And you don't have to use it for dry snacks.
You can put OJ in it, Water, homemade creamer..what ev.
I doubt I will ever throw my empty creamer bottles away ever again!

Have a great day 
and 
Happy Crafting!

Side Note: I'd like to apologize for not posting these last 5 days.  We had a death in the family and had another one today.  It's been a very hard week for my family to say the least.  I understand all of you had no way of knowing that, but I lost TWO followers in those 5 days and it's a bummer.  I work hard to keep my blog going and to give you guys some useful fun crafts.  So to those two that left I have one thing to say to you..."Baby come back!"  Crafty Soccer Mom misses you!

Monday, February 13, 2012

Paint Chip Napkin Rings


Hello Ladies!
While grocery shopping today, I picked up some paint chips.
I totally feel like I'm doing something wrong by taking paint chips but a girl has to do what a girl has to do :)

I decided to make Paint Chip Napkin Rings for tomorrows Valentine's dinner with the hubs and our boys.
This is SOOOOOOO easy..


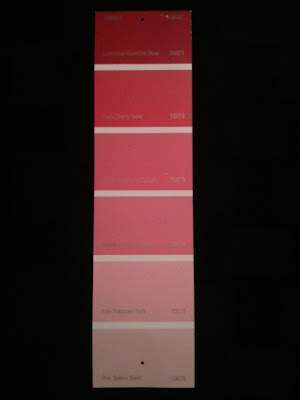
So here's the paint chips I chose..the long skinny ones.


I cut one square off and punched a hole towards the top. 
I then wrapped the bottom around and punched a hole directly where the top hole was.


I made a few hearts as decoration.
My original plan was to buy some of those big paper flowers with brads included but totally forgot.
The hearts will do :)


I attached a small brad in the middle of heart, and then put it in each of the holes in the paint chip.
Badda Bing Badda Boom! 
Done!!

You can really get creative with this....I decided to just use stuff around the house to save money...
but these would be super fun for any holiday or get together!

There are a lot of decorative brads out there to choose from...A LOT.
And if you don't feel like using brads another option would be to use your hot glue gun or use a sticker to keep the loop closed.

Happy Crafting!

Thursday, December 22, 2011

Recycled Snowflake~Craft Fail?

Recycled Snowflake~Craft Fail?


Ok..here's the skinny..being a crafter I can't help but want to turn everything I touch into something...
I ran my kids through McDonalds drive thru today and got a drink holder.


When I got home I couldn't help but wonder...what can I make out of this???

And this is what I am up with...


Here is my "Snowflake" on my front door...pic is dark sorry about that..but it doesn't look so hot.
I like that it also looks like a cross....

How I did this:

Step 1: Cut the "wall" off of the Drink Holder

Step 2: I painted it white

Step 3: I added blue glitter

Done.

Hmm...not super thrilled with it, however it was fun to make I will give it that.  It's super windy outside so the glitter was flying all over the place. I do like the Snowflake concept.
I think that if I do this again, I would paint it a different color, like blue maybe, since my front door is white.

This would be really easy for a kid to decorate with paint or marker.

Have a great day!
Happy Crafting!!

Wednesday, August 31, 2011

Headband

Headband

Yo Yo Yo Ladies!
How's your day going? 
How's mine you ask..well not the best but I did get to make something today so that brightened up my day!

So I just needed to do something that I didn't have to think too much about and so this is what I made this morning :)


I've had these super skinny plastic headbands For..evvvv..errrrr (for all you Sandlot fans lol)
I never wear them..ever..yet I still kept them like any true hoarder crafter would do..

SO..I made up some Yo Yo Flowers ( Tutorial HERE )
With the same Polka Dotted Fabric I've been using forever
I think it's time for some new prints...Oooh a reason to go shopping...wait I don't need a reason do I?

But I digress..


I made one larger Yo Yo Flower and then two small ones to go on either side
Hot glued them to the skinny headband, threw my hair up in a messy bun like every other day and called it good.

I wear my hair up A LOT..so much so that a good friend of mine said to me yesterday as she walked up from behind me "Oh, I didn't recognize you with your hair down"..Yeah that's a problem LOL
Ugh, who has the time? Not me..or maybe I just don't really care? 
I mean, who wants to get hot glue stuck in their hair? Um..not me..it's all about safety folks :)


Close Upppppppp

The fabric has purple, blue and black polka dots so I did a button in each color on the black headband.

I'm thinking about buying some headbands and making some more of these to sell at my craft bazaars I do...they're fun to make and rather easy.
I'm thinking about hitting up the local Dollar Store and getting a 5 pack of different colors...and...I realize I am now rambling...

I'm ready for bed....LOL..if only my kids were! Can I get an Amen?!

Have a good night everyone!

Tuesday, August 30, 2011

T-Shirt Scarf #2

Upcycled T-Shirt Scarf


So here is another way to make a beautiful Scarf out of an old T-Shirt :)

In this case I used one of my oldest son's old T-Shirts...The bigger the T-Shirt the longer the scarf.
My son is 11yrs old, so the shirt wasn't that big, but it still makes a long scarf and I was able to double it up.

So let's get started eh....


First you lay the T-Shirt down flat, and then you cut off the hem at the bottom. 
Next you cut thin strips (not too thin, about 1/2"-1") all the way across the T-Shirt to make big loops.


Next, stretch out each hoop and then wrap it around your hand to form small circles like above.
You can make them as big or small as you like.


With the remaining T-Shirt scraps, cut strips about 2-3" long..this material stretches remember.
Next lay your hoops side by side and tie them together with your strip of T-Shirt.


And this is what you get...You can either leave it open at the end..or tie it together like I did to make one big loop. Now you need to trim off the excess T-Shirt from the knots you tied with the strips of fabric.


Isn't that adorable?! SO easy and fun :) I love it!
Next time I will try it with a bigger shirt so I can make it longer, but I will definitely sport this one.

Hope you enjoyed this tutorial on how to make another type of T-Shirt Scarf
Have a great day!