Hey Guys and Gals!
Today I'm going to show you how to make your very own Duct Tape Zipper Pouch.
The supplies you will need are:
Duct Tape
Xacto Knife or Scissors
Zipper (I used 9")
Hot Glue Gun/Hot Glue
Cutting Board and Ruler for Measuring
I chose to go with the Camo Print...I'll explain why later :)
And I chose a Black 9" Zipper
You can choose any length of color of your choice
I Pre-Cut the first 4 pieces of DT
I cut mine to 11.5 inches because the zipper part is 9" but there is added fabric on each end
You will need to move FAST on the next step so make sure you have those first 4 pieces of DT handy
Heat up your heat gun while you are cutting out your 4 pieces of DT
You want it nice and hot
I could not take a photo of this step because I had to move fast before the glue dried..so here is what I did:
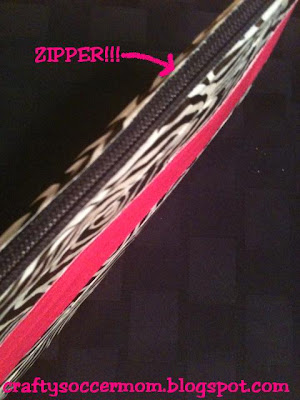
I put a thin line of hot glue along the zipper, making sure to not get it in the zipper part but close to it
The glue dries VERY fast so make sure your tape is ready..
Now put your strip of DT onto the Zipper, again close to the zipper part but not all the way to it..smooth it out
You need to leave some room for the zipper to slide back and fourth
Make sense?
Repeat on the other side of the Zipper, adding a line of Hot Glue and then putting your strip of DT down on top of it, smoothing the DT down onto the fabric of the Zipper
Now flip it over and do it again to the back side
Adding Hot Glue from left to right, adding your DT Strip, and smoothing it out
This can get a little tricky if you don't have some experience with DT
Once those two pieces of DT touch each other they are stuck
Wheww! The hard part is over!
Flip the piece back over to the front and start adding more strips of DT, overlapping about 1/2"
I added 5 pieces on each side..meaning
I added a piece, flipped it over, added a piece flipped it over, etc..
Work on one side at a time
Once I added all the DT to one side of the pouch, making a DT Fabric if you will, I folded up the sticky end so there was no sticky
Next I got to working on the other side, repeating the same process with another 5 Strips of DT
Only don't fold up that last piece of sticky just yet..
Fold the pouch together to form the "pouch" and take the sticky from one side and stick it over the the other side..
Ugh..hard to explain but super easy to do
You just sealed up the bottom
So now your pouch is almost complete, we just need to close up the sides now that the bottom is all sealed up
If you need to trim up your sides to even them up, do that now..
Ready? Okie Dokie let's finish this bad boy :)
Cut a strip of DT 1/2"-1" longer than your sides
I cut 1/2" off the width so my strip was 1 1/2" wide and 6" long
Put your strip onto the side of the Pouch right up to where the Zipper starts...flip over and add a little slice to the DT like I did in the photo
Fold that skinny piece down over the pouch
This seals up the "hole" at the ends of the zippers
Now cut off that rectangular piece and toss it in the trash
Or reuse it for something else, but we don't need it
Fold over that strip to secure the side of the Pouch
Repeat same technique on other side
You did it! Look at our amazing Duct Tape Zipper Pouch!
Now listen...you realize all the options you have with this right?
It can be any size and/or length
You can use it for a tremendous amount of things!
Makeup, Toys, Money, Wallet, Use it as a clutch, Put Coupons in it, Toiletries bag..I mean I could go on and on
BUT I WON'T :)
Now stay tuned tomorrow, because I am going to show you something absolutely amazing that I am going to do with this pouch!
I'm taking it up a notch, are you ready!
I'm so excited to show you!!
This is why I chose to use the Camo Print...what I'm making tomorrow with this pouch is for my son...
Any ideas???
Until tomorrow!


