Sunday, May 6, 2012

Duct Tape Roll Art


I have a ton of empty Duct Tape Rolls lying around...I just can't bring myself to throw them in the recycle bin.
So I made a Duct Tape Roll Cross for my bedroom!
A couple days ago one of my followers Noreen asked me what she could do with her empty rolls.
It was perfect timing cause I had already had a few idea's up my sleeve for this week. 
So Noreen, here is just one of those idea's I promised you :)

Here's how I did it:


I grabbed a bunch of empty rolls and started laying them out on my counter.
I knew I wanted to make a cross so I just moved them around until I got the cross that I liked.

I ended up using 10 rolls.  6 going down the vertical part of the cross, and 2 on each side for the horizontal portion of the cross.


Next I broke out my hot glue gun...I heart my glue gun!
I simply put one thick strip of glue down the side of the roll and connected it to another roll.
I squeezed them together for a second and that was it.


I went on to the next one, making sure to keep the shape of my cross and making sure they were even.


Half way done.  So now I took it outside and spray painted it with a light blue spray paint I already had in the garage.  It matches the blue in my bedroom so it worked out well.
Our bedroom colors are tan, light blue and brown.


Done! Now all I needed was one little nail and I hung it on my wall....Well Crafty Soccer Dad actually did the hammering of the nail into the wall.
I gotta give credit where credit is due :) 


So what do you think? 
I love it!  
I think it's pretty awesome!  I'm really happy with how it turned out.

I'll have more projects soon, that you can use your empty DT rolls.

Have a great day 
and
Happy Crafting!

Wednesday, May 2, 2012

TLC Creations

My girl Mindie over at Bacon Time has an awesome deal going on at her Etsy Shop TLC Creations

She is offering a 25% discount on all her merchandise for Mother's Day.
Yes you heard me right 25% off!!!

As if that wasn't enough...she is also hosting a giveaway for a $10 gift certificate at TLC Creations!

Amazing!

If you are looking for a piece of jewelry to give to your Mother for Mother's Day, this is the shop to go to.
Mindie has a wide selection of jewelry to pick from and a lot of unique vintage inspired pieces.


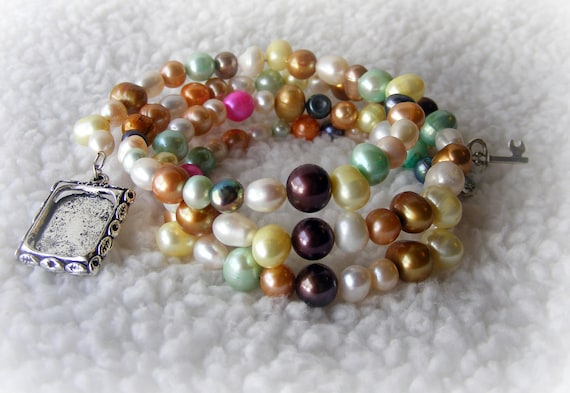
Bracelet Real Pearls 

Isn't this gorgeous?? It has a frame charm to add a photo of that special someone, like her Grandchildren.

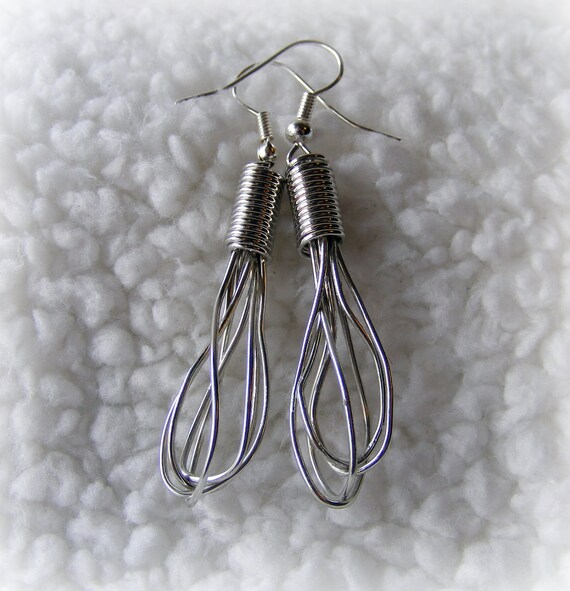
Whisk Me Away 

Does your Mom like to bake?  Check out these handmade wire whisk earrings!
So adorable!

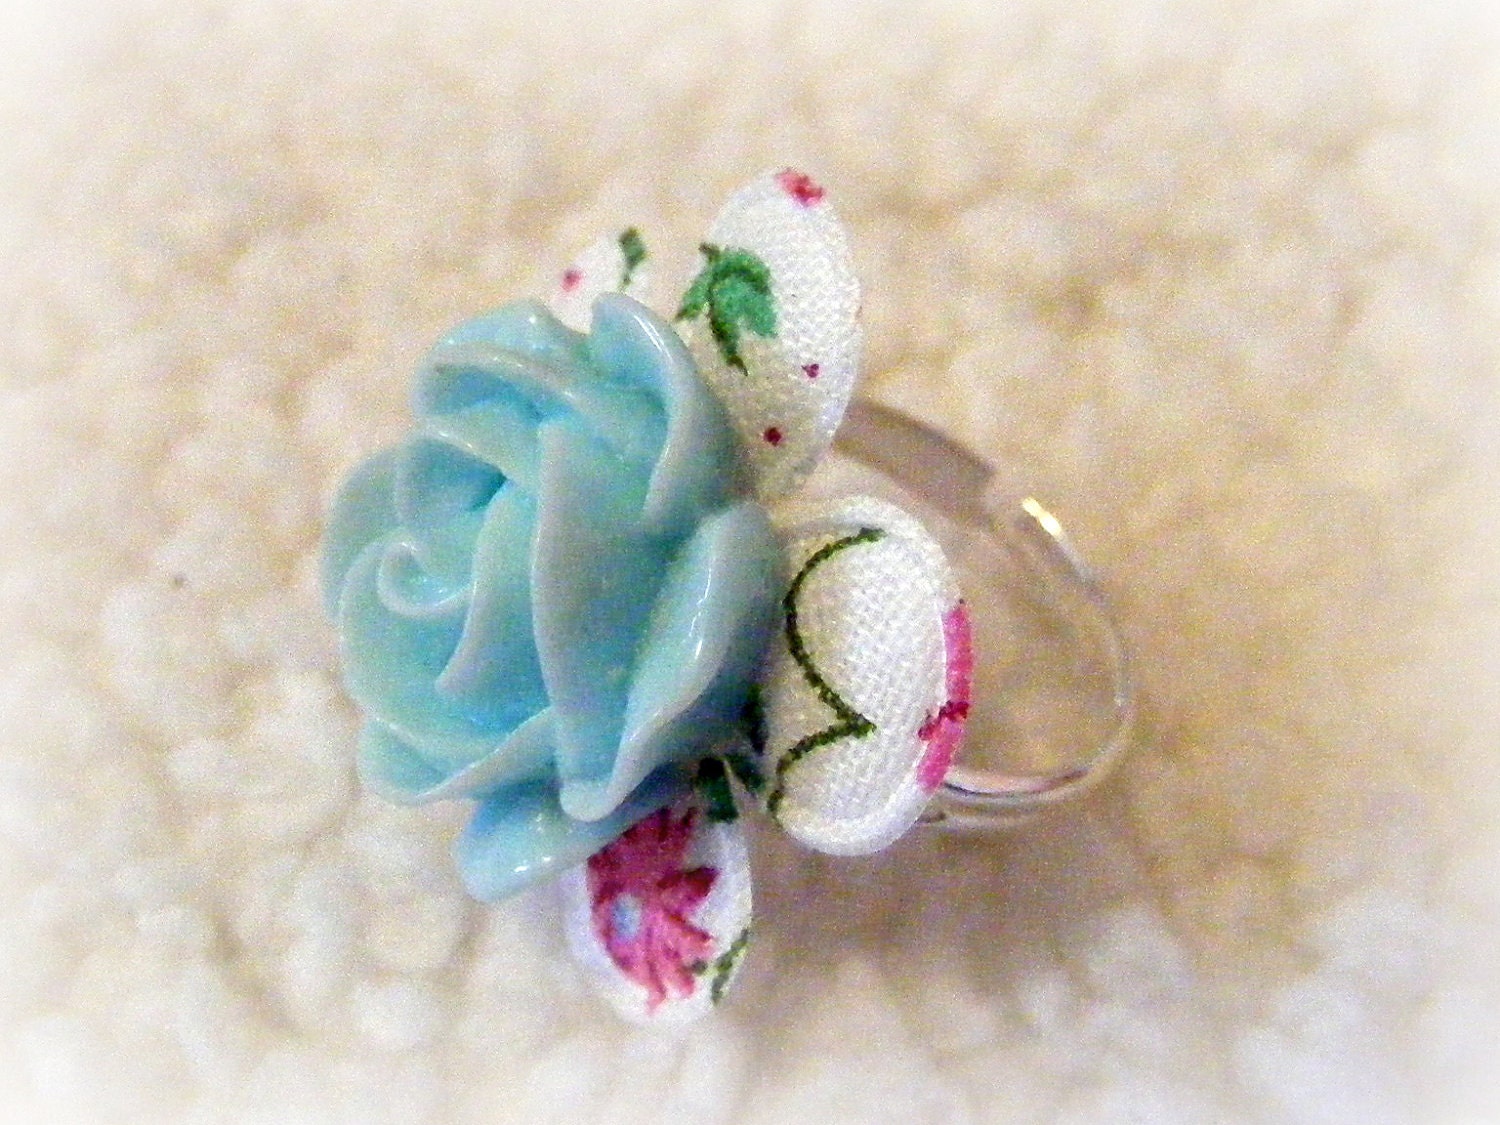
Ring Spring Rose

Isn't this ring adorbs!  I love this, so pretty.

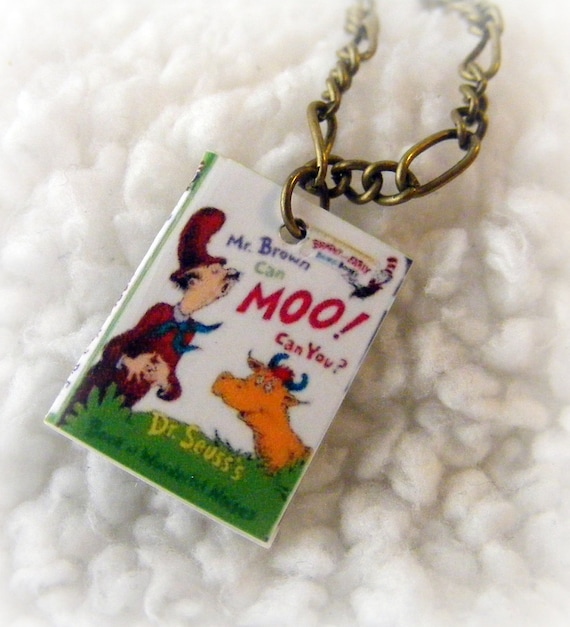
Necklace Dr. Seuss's Mr. Brown Can Moo 

Did your Mother read this book to you as a child? 
What a great gift this would be for her, a replica of the book made into a charm.
So cute and creative!!

You get the idea, I could go on and on with all the items Mindie has in her shop.
There are 120 items to choose from, yes 120 wonderful pieces to pick from.

So if you haven't checked out TLC Creations yet, head on over and take a look.

If you want the coupon code to receive 25% off your purchase, head on over to Mindie's blog
and check out her post on this fabulous deal! 

Monday, April 30, 2012

Duct Tape Art

Hello!

Lately I've been keeping busy working out in my yard and making lot's of merchandise for my Etsy Shop and Craft Fairs.

I just signed up for a big Outdoor Fair and it's in a couple weeks!
Which means I need to get move'n on making some stuff to sell :)

I wanted to show you what I made tonight....
Drum roll please........


This is my latest piece of Duct Tape Art!

This is 100% Duct Tape on a thin 8 x 10 Canvas.

What do you think?
Do you know who this is?

If not....


It's these two..Edward and Bella from the Twilight Series

I plan on making a lot more Duct Tape Art for my Craft Fair.

I've also been busy making Duct Tape Wallets
Here are a few of my newest creations...

 Those are just a few.
These three have all been sold or given away, but they are my newest ones.

I have a ton more, but I don't want to bore you with them all LOL :)

Any who, thanks for checking out my newest stuff, and letting me share my Duct Tape Art!
There will be more characters to come :)

Have a great night!


Thursday, April 26, 2012

DIY Bubble Fun


This is so much fun!
First let me start out by saying, this past weekend it was 80 Degrees...
the last couple days have been rainy and overcast :(

So when we looked outside and saw a break in the rain and some sunshine...
we jumped on it.
We went outside and had some bubble fun :)

 
I took a small empty plastic soda bottle and cut off the bottom.
You could use a water bottle, probably even a 2 liter but I haven't tried that.

I cut up an old hand towel and covered the bottom of the bottle using rubber bands.
I suppose you could hot glue it, but it was quicker to just wrap some rubber bands around it.
We were on borrowed time here lol...

I put some bubbles in a shallow bowl.
For my post on a DIY Bubble Recipe go HERE

I dampened the towel first then set it in the bowl.


Pick it up and blow thru the mouth piece....and
Let the games begin!!!


It is VERY windy where I live, so big bubble chunks were flying everywhere!!


Bubble Chunk..
But never fear!
Batman is here!!
Or Batman Crocs are here to stomp out the bubbles LOL :)


What you end up getting is a long tube like bubble chunk (for lack of a better word)
We seriously had so much fun with this!

Until it went from this...


To this...


And now it's raining!

But I'm so glad I jumped on that 15-20 minutes of sunshine, it was so worth it.

So here's a recap of what you need for this fun project:
An empty plastic bottle
Old washcloth or towel (the thinner the better)
Bubbles
Rubber Bands (just a couple)
Scissors

So easy, and some good 'ole recycled fun :)

Enjoy your day
and
Happy Crafting!

Wednesday, April 25, 2012

DIY Star Earrings


I'm baaaaaaack!
Thank goodness!  Being without a computer is the pits!!!

Today I'm going to show you how to make these easy peasy Star Earrings.
They are super duper inexpensive too...which is always a plus right ladies?!

I came up with this idea just out of the blue...one of those Ah-Ha moments.
I love how they turned out :)

All you need is:
Wire (I used 24 gauge because that's what I had on hand)
Tube like seed beads (I don't know the technical name for them)


Cut a piece of wire about 4.5 inches long


Pick out 10 of the tube beads
Mine are glass but plastic is fine too


Put a bead on and then bend one end leaving about 1-1.5 inches at the top


Add your second bead right up against the first, then bend to a triangle shape


Add another bead right up against the previous bead THEN bend
Keep repeating this process


When you make it back around to where you started, after all 10 beads are on, take the two ends of wire and twist them together
Don't worry if your star is losing it's shape a little, it's easy to bend it back into shape


Warning!  If you twist too much, you will put too much pressure on your beads and if they are glass they will break
You could also make it too tight to where it's hard to keep your star shape
So just enough twist to keep them together


Trim any excess wire and then with your needle nose pliers make a loop


Add your earring wires and you are finished!

This is so easy, and it only takes a minute to make.

You can use all one color of bead or mix it up with a variety of colors.
These beads are super cheap, and light weight.

Make earrings or use them as a necklace charm.

Have a great day
and 
Happy Crafting!

Tuesday, April 24, 2012

Computer problems :(

Hey guys! Just wanted to give you an update. I'm having computer problems and that's why I haven't posted in so long. My computers are in the process of being fixed so I should be back in a day or so. Fingers crossed!! Right now I'm posting from my phone...it literally took forever for me to figure our how to do this from my phone lol! Thank you for your patience!!

Wednesday, April 18, 2012

Face Magnet Fun


As I'm strolling thru the craft store today I came upon the magnet section.

I love magnets, they are fun, and you can do some much with them.
I found a 3 pack of Magnet Sheets and an idea popped in my head...Boing!

Here's what I did:


Bought these magnet sheets, they have paper on one side to color on, and magnet on the back.
I designed some faces on the computer and tried them in the printer.
They work!

OH! I almost forgot....


I snagged this round pizza pan at the Dollar Store!


I made one sheet with different mouth's...


Eyes....


And then noses and mustaches...gotta have the stashes!!

After printing those, I began to cut away.  Super easy to cut through.


Here they are all cut out!!

Now let the games begin!


The youngest with his first creation...that's supposed to be me
I'm flattered..really I am...


The oldest with his creation...not bad not bad.

So we've been having a blast making silly faces.  Ladies with mustaches, crazy looking dudes, you know all the good stuff.

I have a feeling when the kids go to bed, my hubs and I will make some silly faces too, it's addicting!

Now...am I considered a hoarder because I want to keep all of this..


I know I can do stuff with it!!
Don't judge me LOL...I know, it's weird, but you can color on this paper so I thought I'd cut out some shapes and let the little's make some fridge magnets.
OR
I may try drawing some new facial features with my Sharpies.
We need Ears, I totally forgot those, and maybe some gross stuff like...
Scars, Warts, Boogers..
And practical stuff like..
Sunglasses, Eye Glasses, Earrings..that sort of thing.

I'm sure I'll be back at the Craft store buying more magnet paper sheets before I know it.

Plus think of all the other possibilities..
Dress up dolls, Alphabet, Numbers, Animals, Farm....

My next Project...Star Wars!
The ships, and characters.  My son WOULD freak out!
This is perfect for in the car, or when you just need a few minutes of quiet.

I plan on making a pouch on the back to store all the magnets.

Have a great night 
and 
Happy Crafting!!